
Blog

What Is a UV DTF Machine and How Does It Work?

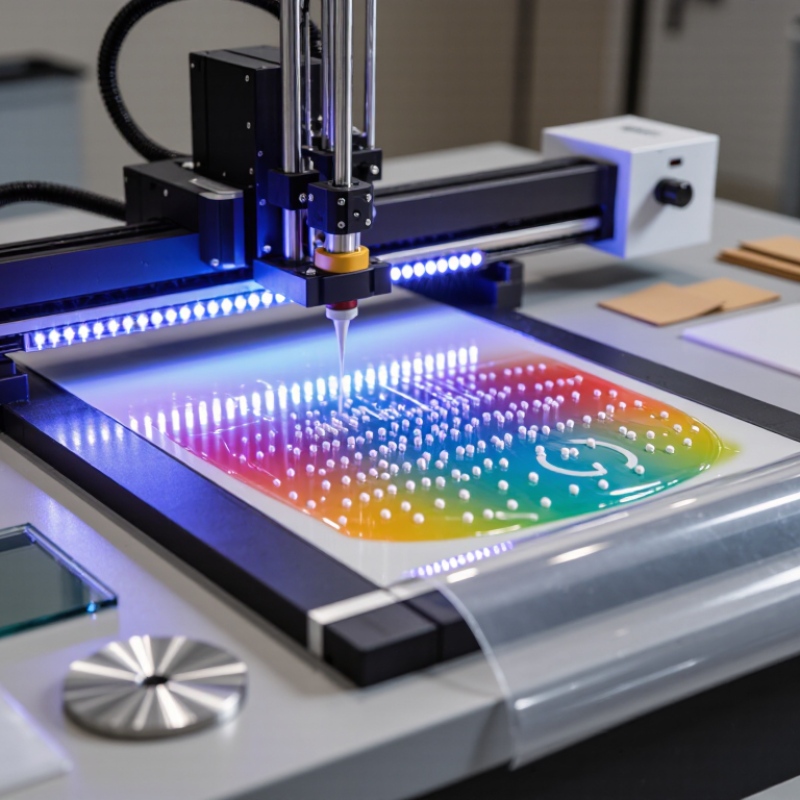
A Uv Dtf Machine creates detailed, durable transfers without directly heating the final product. It prints designs onto a special film using ultraviolet-curable inks. Tiny droplets form the image, while UV light cures each layer almost immediately. The result is a raised, colorful transfer with noticeable texture.

The working process has several precise stages. The printer usually applies color, white ink, and a clear varnish layer. The white layer improves brightness on dark surfaces. The varnish adds gloss and helps protect fine details. After printing, an adhesive film is laminated over the design. The transfer can then be pressed onto compatible items, including glass, acrylic, metal, leather, and selected plastics.

Surface preparation matters greatly. Dust, oil, moisture, and uneven textures can weaken adhesion. In practical testing, a clean glass panel may produce sharper edges than a rough, flexible surface. Print settings also require adjustment. Ink density, curing strength, film quality, and pressure can change the final appearance. It is not magic.

This technology offers useful flexibility for short-run branding, personalized gifts, labels, and decorative products. However, it is not suitable for every material or environment. Some surfaces need testing before production. Outdoor exposure, repeated washing, and heavy friction may affect durability. A reliable operator checks adhesion, color consistency, and curing before selling finished work. That step is easy to skip. It should not be. Understanding how the Uv Dtf Machine works helps users choose proper materials, reduce waste, and make more informed production decisions.
What Is a UV DTF Machine and How Does It Work?

What Is a UV DTF Machine?

A UV DTF machine is a digital printing system for decorating hard, uneven, or difficult-to-print surfaces. Unlike direct UV printing, it does not print onto the final object. Instead, the machine prints UV-curable ink onto a coated film. A second adhesive film then covers the printed design. After curing under UV-LED light, the image becomes a transfer that can be pressed onto items such as glass, metal, acrylic, ceramic, and coated wood.

The process is precise, but not foolproof. Ink forms the visual layer, while the adhesive film provides the grip. Pressure transfers the design; heat is usually unnecessary. This makes UV DTF useful for short custom runs and detailed graphics. Grand View Research estimated the global UV printing market at about USD 2.65 billion in 2023, with strong growth expected through 2030. That figure reflects wider UV printing, not UV DTF alone. The distinction matters.

Tips: Keep the film surface dust-free. Test adhesion on the real material. Curved objects need careful pressure control. A design may look perfect before transfer, yet fail around edges after handling. I have found that curing settings deserve more attention than beginners expect. Excessive curing can make layers brittle, while insufficient curing may cause smearing or weak adhesion. Record ink coverage, curing time, and surface results for each material. Small notes prevent repeated mistakes.

What Is a UV DTF Machine and How Does It Work?

Data Dimension Typical Information How It Relates to UV DTF Printing
Definition Direct-to-film transfer system using ultraviolet-curable ink The design is printed on a special film and later transferred to a product rather than printed directly onto the final object.
Core Printing Method Inkjet printing with UV curing Printheads deposit ink onto the film, while integrated UV light cures the ink almost immediately.
Main Film Structure Printing film plus adhesive transfer film The printing film receives the artwork, while the adhesive film helps lift and apply the cured design to the target surface.
Typical Ink Layers Color ink, optional white ink, and a clear varnish layer White ink improves opacity on dark surfaces, while clear varnish can add a raised or glossy finish.
Curing Technology LED or lamp-based ultraviolet curing UV exposure polymerizes the ink during or immediately after printing, producing a dry and transferable graphic.
Transfer Process Print, cure, laminate, position, press, and peel After printing, the design is laminated with adhesive film, placed on the product, pressed firmly, and released from the carrier film.
Compatible Surfaces Smooth, hard, and relatively clean surfaces Common examples include coated metal, glass, acrylic, rigid plastics, ceramics, leather-like materials, and selected wood products.
Surface Limitations Rough, dusty, oily, porous, or highly flexible surfaces may reduce adhesion Cleaning, testing, and selecting a suitable surface finish are important for consistent transfer quality.
Typical Visual Effects Full color, white underbase, gloss, and raised texture Layered ink control allows detailed graphics and decorative finishes without traditional screen-printing setup.
Image Preparation Raster artwork with transparent background is commonly used Transparent artwork helps define the exact printed shape and reduces unwanted film or ink around the design.
Production Advantage Suitable for short runs, customization, and varied product shapes The transfer method avoids the need to place the entire product inside a printer and supports on-demand production.
Key Maintenance Tasks Nozzle checks, printhead cleaning, ink circulation, and film-path inspection Regular maintenance helps prevent blocked nozzles, uneven color, banding, and inconsistent white-ink output.
Important Safety Considerations UV exposure, ink handling, ventilation, and waste disposal Operators should follow equipment instructions, avoid direct UV exposure, use suitable personal protection, and handle uncured ink responsibly.
Best Use Cases Product labels, promotional items, decorative panels, packaging accents, and personalized goods UV DTF is especially useful when a durable, detailed graphic is needed on a rigid item that is difficult to print directly.

What Are the Main Components of a UV DTF Printer?

A UV DTF machine prints colorful designs onto special transfer film instead of directly onto an object. The process usually begins with an adhesive-coated A film. A precision printhead places white ink, color ink, and protective layers in controlled passes. UV lamps cure each layer immediately. The design becomes firm, detailed, and ready for transfer.

The main components determine print quality. Ink tanks supply separate channels for white, cyan, magenta, yellow, black, and sometimes clear ink. The printhead controls droplet size and placement. Even tiny nozzle blockages can create visible lines. Film rollers keep the material flat during printing. A control board manages speed, color order, curing strength, and feeding accuracy. These settings need practical testing, not blind trust.

The curing unit is essential. Its UV lamps harden the ink before the film moves forward. Excessive curing may make the surface brittle. Weak curing can cause smearing or poor adhesion. After printing, a laminating section joins the printed A film with a B film. This adhesive layer helps transfer the design onto glass, plastic, metal, leather, and other smooth surfaces.

I have found that dust is an underestimated problem. A clean work area matters. Regular nozzle checks, gentle cleaning, and stable temperature improve reliability. Still, every material behaves differently, so a small test transfer remains the safest quality check.

How Does the UV DTF Printing Process Work?

A UV DTF machine creates durable transfers for hard, non-porous surfaces. The process begins with digital artwork prepared at the correct size and resolution. Small text needs careful checking. Fine details can disappear if the file is too soft.

The printer places ink onto a special film in several layers. White ink usually forms the base, while colored ink builds the image. A clear varnish layer can add shine and protection. UV light cures each layer immediately, making the printed design dry during production. Next, an adhesive film is laminated over the image. This creates the finished transfer, which can be stored briefly before application. To use it, clean the surface, remove the backing, and press the transfer firmly onto the item. Peel the carrier film slowly. Uneven pressure may leave tiny bubbles or missing edges.

Tips: Test one piece first. Glass, coated metal, acrylic, and smooth plastic usually work well. Dust and oil can reduce adhesion, even when the surface looks clean. Avoid rough or flexible materials unless the film instructions support them. I have found that slower peeling gives better control, but results still vary with pressure, ink coverage, and surface temperature. The process feels simple, yet rushed preparation often causes preventable failures.

Which Materials Can UV DTF Transfers Decorate?

A UV DTF machine creates cured, decorative transfers on a special film. The finished design can then move onto many hard surfaces. Unlike direct printing, the machine does not print straight onto the final object. This makes small-batch personalization more flexible.

UV DTF transfers work well on glass, acrylic, ceramic, coated metal, and smooth plastic. They can decorate tumblers, phone cases, jars, signs, gift boxes, and display panels. Smooth leather-like materials may also accept a transfer after testing. The surface should be clean, dry, and free from oil. Dust can create tiny bubbles beneath the film. It happens more often than expected.

Coated wood may work, but rough grain can reduce contact and weaken the design. Unfinished wood, fabric, silicone, and heavily textured surfaces are usually poor choices. Curved objects require careful pressure and slow application. Sharp edges may lift the transfer over time. A hand wash test is sensible for drinkware, even when the decoration looks firmly attached. Dishwasher heat can damage adhesion. So can repeated rubbing. I would test each new material before accepting a large order. The transfer may appear perfect on day one, yet fail after moisture, friction, or temperature changes. Surface preparation remains the unglamorous part. It also decides the result.

What Is a UV DTF Machine and Which Materials Can UV DTF Transfers Decorate?

UV DTF transfers are made by printing UV-curable ink onto a film, applying adhesive powder or adhesive layers, and transferring the cured design to a clean, smooth surface. The chart shows general suitability for common material categories.

Score: 1 = generally suitable for UV DTF decoration; 0 = generally unsuitable without a specially prepared surface. UV DTF is primarily intended for rigid, non-porous materials, while textiles and unfinished porous surfaces are not typical applications.

What Are the Benefits and Limitations of UV DTF Printing?

A UV DTF machine creates transfers without printing directly onto the final object. It prints UV-curable ink onto a coated film, then cures the ink with ultraviolet light. A second adhesive film is applied over the design. The finished transfer can then be pressed onto a clean surface by hand.

Its biggest benefit is flexibility. UV DTF printing works well on glass, metal, acrylic, ceramics, and many rigid plastics. It can produce sharp lettering, bright colors, white details, and slightly raised textures. Setup is also convenient for short runs. There is no cutting plotter or heat press required. A small design may be ready within minutes.

Limitations still matter. Adhesion depends heavily on surface preparation. Dust, oil, moisture, or deep texture can cause lifting. Curved objects may create wrinkles or incomplete contact. The process is usually unsuitable for stretchy fabrics and rough, porous materials. Printed surfaces can resist normal handling, but harsh scraping, chemicals, or repeated washing may damage them. Test a sample first. Always.

In practical production, operators should check ink curing, film alignment, and transfer pressure. Poor curing can leave a tacky surface. Excessive pressure can distort fine details. I would not treat every successful sample as proof of long-term durability. Results vary with the material, storage conditions, and daily use. Careful testing remains necessary.

Copyright © 2025 The Toolroom Inc. All Rights Reserved.
Website Design St Louis by IQComputing